When connecting your system with the Wi-Fi network, you sometimes see the message “Limited or No connectivity”. This issue is still found in Windows 10 at times. While this may be an issue with the Wi-Fi router which you can be fixed physically, it can also result from some issues with your system settings.

Luckily, there are several methods to fix this issue using your Windows 10 system. Let us look at each of them:
Quick Overivew
Method I: Disabling Network Adapters
Before implementing this step, make sure you have the driver CD/software so that if in case the driver goes missing then you will be able to restore it.
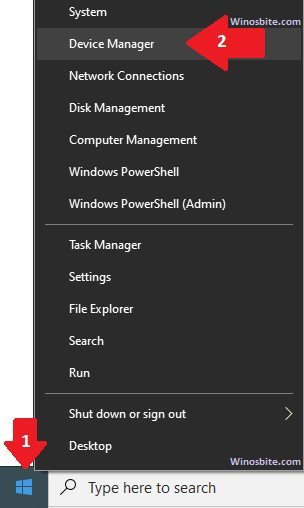
1) Right-click on the Start button and select Device Manager to open it.
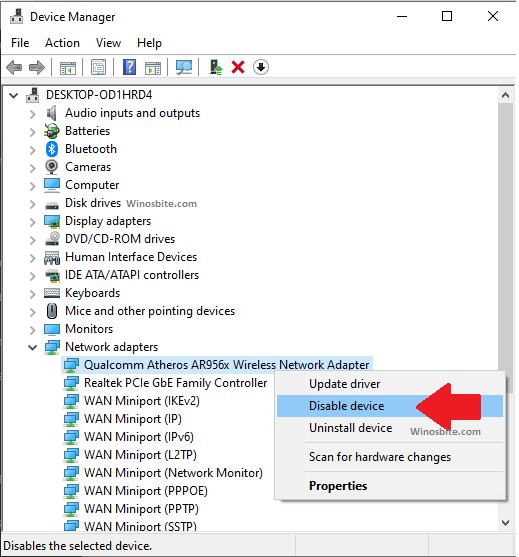
2) Go to Network adapters and double click to expand it

3) Right-click on your Wi-Fi networking adapter / Wireless Network Adapter or modem and select Disable from the list.
4) Reboot your system
5) Now, go to Device manager > Network Adapters
6) Right-click on the same Network/Wireless adapter or modem and select Enable from the list.
7) Close device manager.
This should fix the Limited Wifi connectivity issue and you will be able to connect to the wireless internet.
Method II: Using Power options
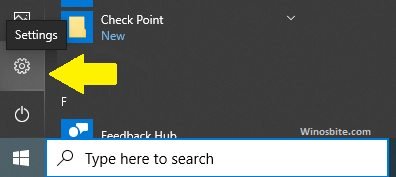
1) Click on the Start and select Settings (circle) from the list
2) In the settings window, click on System
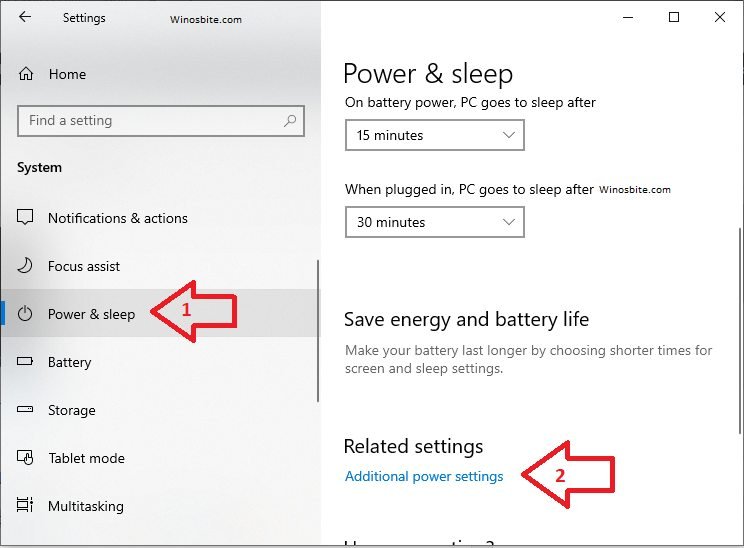
4) Browse for Power & Sleep on the left panel and click on
5) In the right panel, go to Additional power settings under Related settings heading
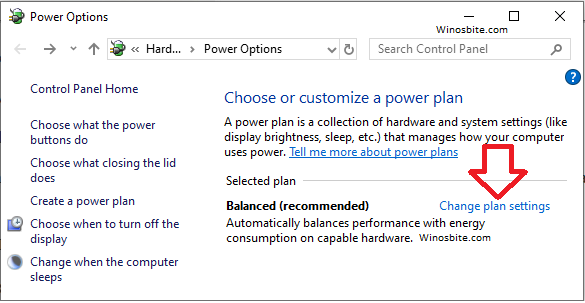
6) In Power Options window, click on Change plan settings
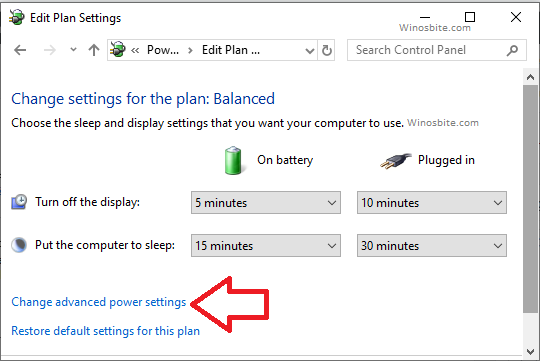
7) In the next window, click on Change advanced power settings
8) In Advanced settings, navigate to Wireless Adapter Settings > Power Saving Mode
9) Click on On battery and select Maximum performance from the drop-down menu. Do the same for “Plugged in”
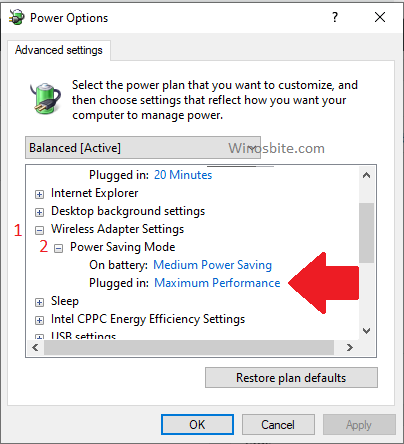
10) Click on Apply and then on OK
Method III: Reinstalling Wi-Fi Driver
1) Browse for This PC on your desktop and right-click on it.
2) Select Manage from the menu that appears.
3) In the left panel, select Device Manager and then double click on Network adapters on the right-side panel.
4) Select your Wi-Fi network driver and Right-click on it to choose Uninstall
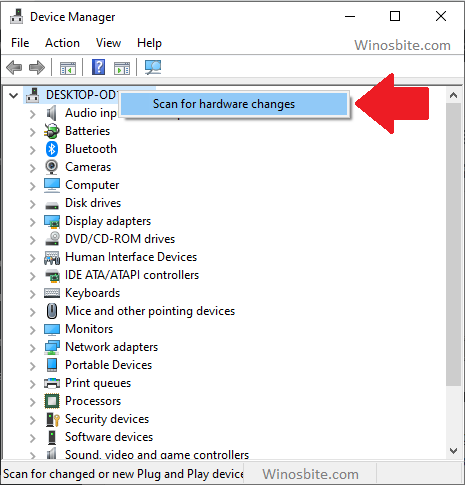
5) Go back to the top of the Menu, right-click on your System name and click on Scan for hardware changes. This will re-install your uninstalled driver and fix the limited access issue.
The above step will fix the Wifi limited access error message on your Windows 10.
Here you can learn to reinstall the audio driver in Windows 10.
Method IV: Using Command Prompt
1) Click on the start menu and type command prompt.
2) Right-click on “Command Prompt” from the list and choose “Run as administrator”
3) Click on “Yes” if “User Account Control” dialogue box appears
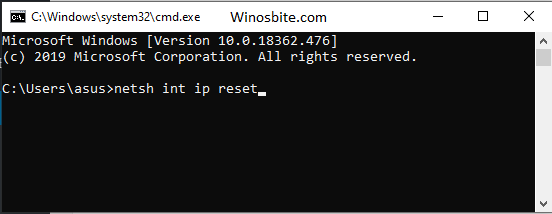
4) In the CMD window, type: netsh winsock reset catalog and press the Enter key. Then type: netsh int ipv4 reset reset.log and press Enter.
OR
- An alternative to this command is, netsh int ip reset. Press Enter after typing this.
OR
- A second alternative to this command is, typing the following four commands in succession and pressing the enter key after each command:
netsh int tcp set heuristics disabled
netsh int tcp set global autotuninglevel=disabled
netsh int tcp set global rss=enabled
netsh int tcp show global
Also, find the command for device manager step by step.
- Exit CMD and Restart your computer.
Once your system will restart then the error message limited access wifi or no internet issue will be fixed.
Method V: Using Troubleshooter
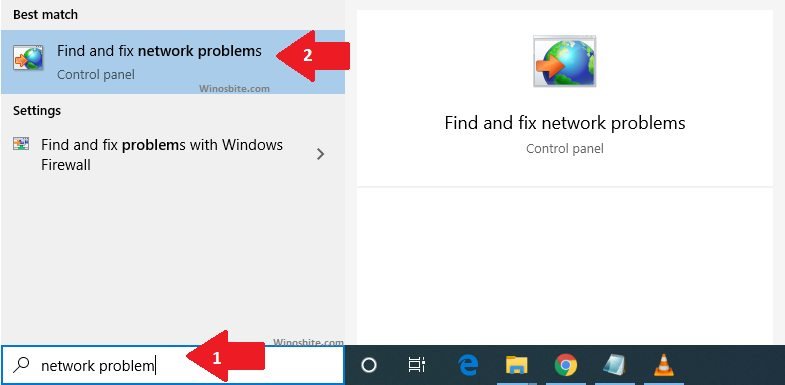
1) Go to the search box, type Network Problems and click on it
2) Troubleshoot internet connection window will open and click on Next button
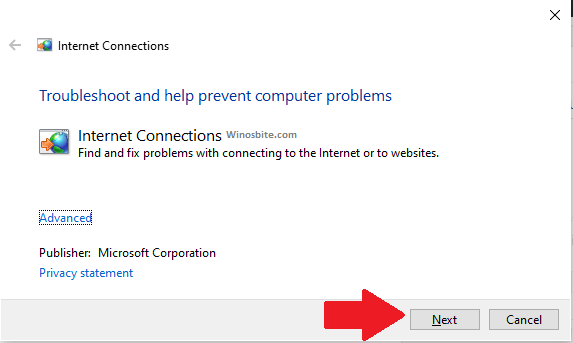
This will start troubleshooting. Once completed, re-connect your Wi-Fi and open your browser to see if the Internet works.
Method VI: Update driver
1) Go to the Start button and Right-click on it.
2) Select the Device Manager to open it.
3) Now, expand Network adapters by double-clicking on it.
4) Select the Wi-Fi driver you use and Right-click on it.
5) Select Update Driver Software
There are two options here. You can choose either one:
- Select “Search automatically for updated driver software“. Windows will now search for and download the driver updates itself via this option.
- Or, you can select “Browse my computer for driver software“. This is when you have manually downloaded and installed the network adapter driver from the manufacturer’s website.
To continue, follow the steps below:
- Click on “Browse…” and search for the downloaded folder on your system
- Once done, click on “Next“.
- Then, follow the instructions on the screen and click on “Close“.
7. Once the update is complete, close the window and restart your system.
This step will help you to fix the limited access wifi issue.
Hopefully,above-provided steps will fix the problem, however, if you are not able to fix it then leave your issue along with your system configuration, and I will try my best to answer it.
Also read: