dns_probe_finished_bad_config is a well known error that appear when you access internet. This issue can be fixed by following resetting browser, router, dns, renewing ip address and other few tricks. This one is a very common error associated with the network on which a user is working on. The error causes a blank screen to appear with the error message DNS_PROBE_FINISHED_BAD_CONFIG due to which you will not be able to access the internet.

Are you seeing DNS_PROBE_FINISHED_BAD_CONFIG error message while trying to connect to internet? Use these 4 ways to fix network issue on Windows computer..
Quick Overivew
Causes of error DNS_PROBE_FINISHED_BAD_CONFIG
There are a number of causes why you can receive this error. The error is not specific to any website but is caused due to a connection with your network. The primary cause for this is a change in your network settings, which could have been done by an app or a system update that you might have recently installed or could have been done by you accidentally. This network setting can change the connectivity settings of your router which can result in the error.
How to fix DNS_PROBE_FINISHED_BAD_CONFIG error?
In order to fix this error, you can use a number of methods. Some of them are listed below.
1) Restart your Router
The error can occur if the server end of the connection is not able to register your router as a part of the connection.
- In order to fix this issue, turn off your router and system and restart them.
- Just unplug the router from power and connect it after 2 minute.
2) Reset Chrome
As Chrome is the most used browser, resetting it can help you get rid of the error.
- Open Chrome and go to Settings

- Find Advance option before bottom page.
- Under Reset and clean up, click on Restore settings to their original defaults
- Find Reset Settings and click on the Reset


How to disable Chrome auto update
3) Clean Temporary Files
When you access internet, your browser by default store several temporary files on your computer in order to speed up browsing. But sometimes stored temporary files corrupt/damaged and start showing DNS error. In this case, you will have to clean and remove all temp files from system.3
Follow below steps, to delete temp files from Windows OS:
- Open Run command by pressing Windows + R key
- Now type %temp% and hit Enter button.


- Now, Local Temp directory will open, select all files and press Shift + Delete button
This will remove all temp files from your computer and browser will start storing fresh temp files on computer. Most probably this step will fix DNS error message.
4) Remove Browser Cache
Just like temp files get corrupt, browser cache files also get damaged and start showing DNS error. To fix this, you will have to make sure to remove all cookies and other old files. Follow below steps to do so:
a) Open Chrome browser
b) Click on Settings from top right hand side button


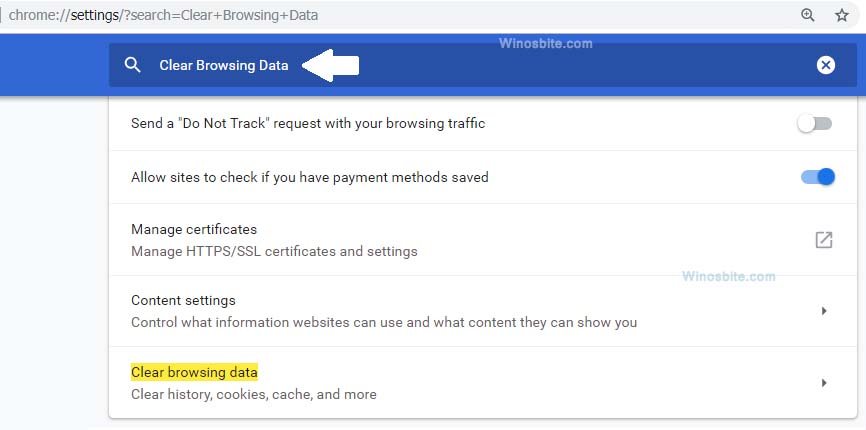
c) Type Clear Browsing Data on given search option


d) Click on Clear browsing data option and click again on Clear Data.
This step will fix existing issue and allow you to access internet without showing dns error.
Similar chrome err_name_not_resolved error.
5) Change DNS Address
If the error is caused by a bad DNS address, then also you might seen dns_probe_finished_bad_config error on your Windows 7, 10 operating system. You can change it to fix the problem by following below steps:
1) Open the Start menu
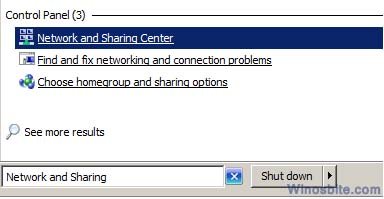
2) Type ‘Network and Sharing‘ and click on it


3) When the network settings open, find Change Adapter Settings located on Left Hand Side and click on it.
4) Choose your running Local Area Connection from the list of connections on the new window, right click and select Properties
5) Find Internet Protocol Version 4 (TCP/IPv4) and double click on it
6) Change your DNS server address to 8.8.8.8 and enter 8.8.4.4 in the alternate DNS server field and save the settings.
Now, open Chrome or Explorer or Mozilla browser, and access the internet. It should be work without showing any DNS error.
6) Flush DNS and renew IP address
In case nothing is working, then you will have to renew your IP address in order to fix the problem.
- Press Win+R and type CMD in the run window to open Command Prompt.


- Type the following commands in the command prompt box with hitting Enter after each one of them
ipconfig /flushdns
ipconfig /renew
ipconfig /release
ipconfig /all
Now, restart your computer and your browser should be working fine.
dns_probe_finished_bad_config is most common error that user face and can be fixed by following above steps. The basic idea to remove temporary files, reset browser to default settings, flush DNS and reset DNS on router, any one of these trick can help to fix the issue.
