The 0x8024a223 is an error code faced by Windows users during the Windows update. This error won’t let you download and install the latest update, hence posing a serious threat that should not be ignored under any circumstances. Not being able to download the latest software update means you won’t get new features, improvements, bug fixes, and security patches that Microsoft has bundled in the new update for your Windows 10 operating system.
This usually happens when you try to update Windows 10 and it shows the error 0x8024a223.

I will cover some basic information about the error 0x8024a223 and methods to fix it in this article.
Quick Overivew
What is the 0x8024a223 error and its cause?
This error code in Windows update which is accompanied by the following message:
“There were some problems installing updates, but we will try again later. If you keep seeing this and want to search the web or contact support for information, this may help: (0x8024a223)”
The possible causes of this error are:
- Corrupted or buggy Windows update components
- Antivirus software conflicting with Windows update
- Insider build* of Windows 10 installed on your PC
*You can think of Insider build as a developer version of Windows 10. This version contains extra, experimental features not found in Windows 10 stable build. Insider builds are comparatively unstable than normal builds.
Effects of the error?
Methods to fix the error 0x8024a223 in Windows 10
If your Windows 10 system is frequently receiving an error code 0x8024a223 then follow below-mentioned methods to fix this problem:
Method 1: Run the Windows Update Troubleshooter
This solution takes the highest priority in Windows update related errors. Windows Update Troubleshooter is an improved part of Windows 10 OS that can detect and rectify update related errors automatically. Follow the steps below-
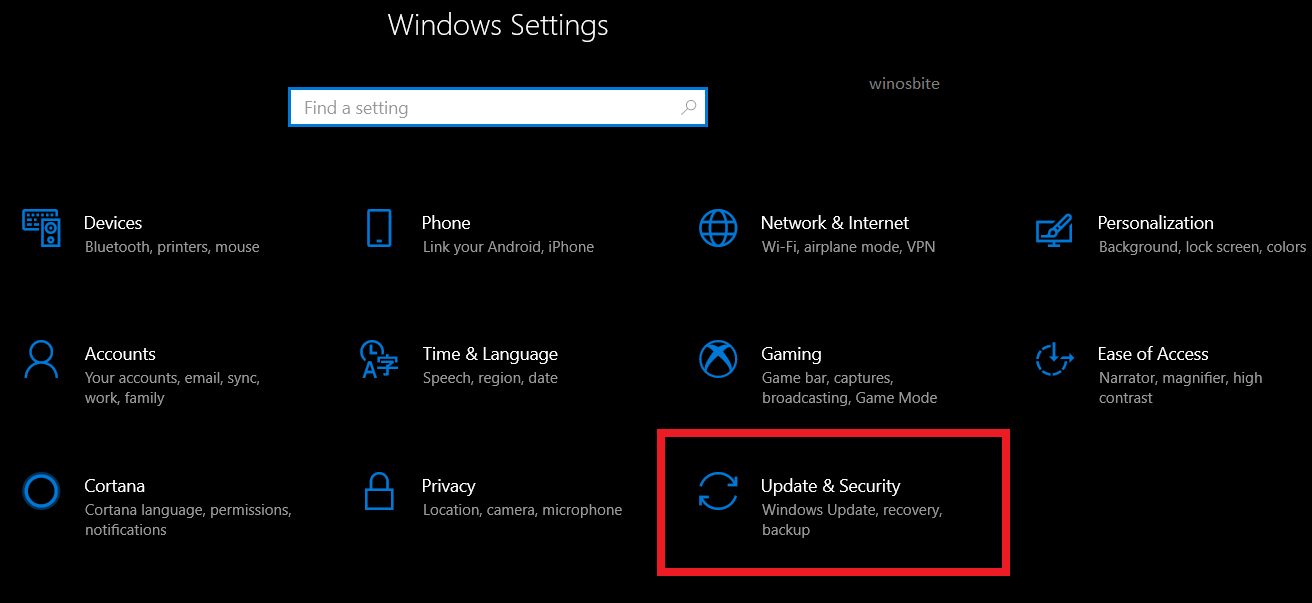
1. Press Windows + I to open Windows Settings
2. Click on Update and Security
3. In the side panel, click on the option called Troubleshoot
4. In the main panel of the Troubleshoot option, click on Windows Update (If you can’t see it, click on Additional Troubleshooters)

5. The troubleshooter will take a few seconds to identify the problems and attempt to fix it.
Method 2: Disallow downloads from other PCs
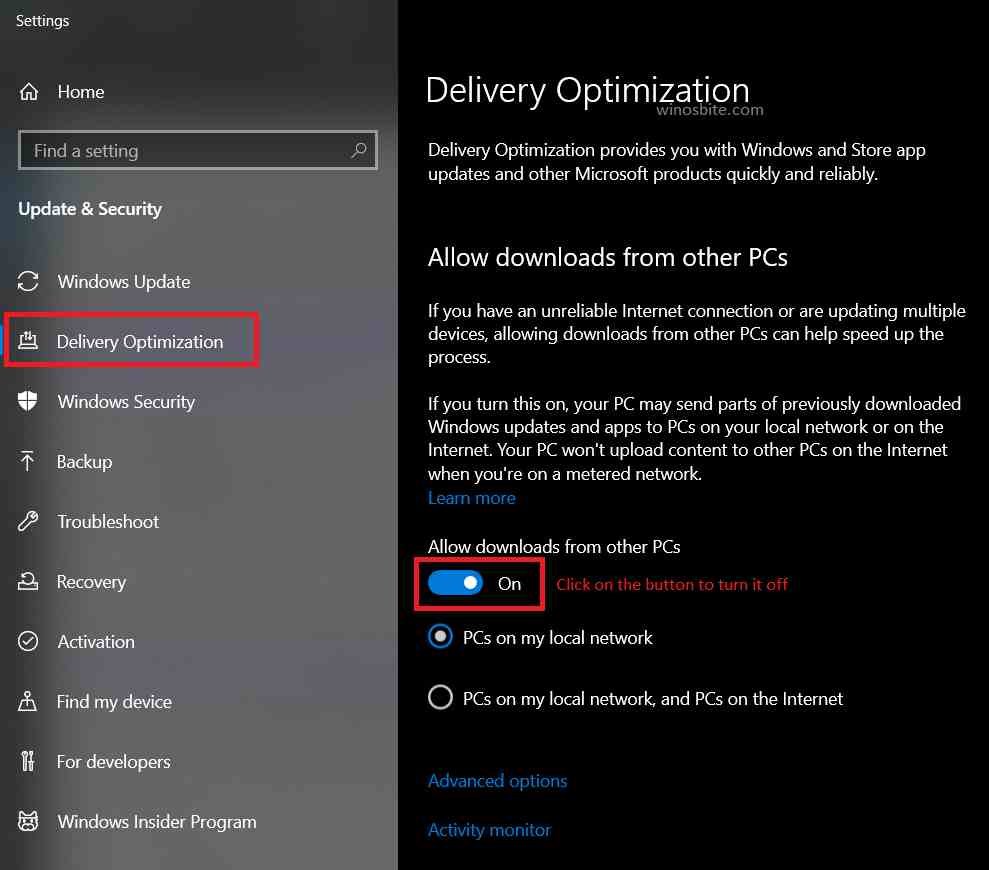
Delivery optimization is a feature that lets you download Windows update from PCs on your local network. This feature is useful when your internet is unreliable. But sometimes delivery optimization interferes with your update so turning it off may solve the problem.
1. Press Windows + I simultaneously to open settings
2. Click on Update and Security
3. In the side panel, click on the option called Delivery Optimization
4. Turn off the radio button ‘Allow downloads from other PCs’
Method 3: Resetting the catroot2 folder and Windows Update components
catroot2 is a folder in the System32 directory of your C: drive that contains signatures of the Windows update package and participates in the update process. This folder just contains temporary cache files required only during the Windows update installation and hence the contents of this folder can be deleted.
1. First, we need to stop the services that are using these folders. To do that, open command prompt as admin and type the following commands one by one. Press ENTER after each.

net stop bits
net stop wuauserv
net stop appidsvc
net stop cryptsvc
These commands will stop Windows update services that are using the catroot2 and SoftwareDistribution.
2. To delete catroot2 and SoftwareDistribution (another Windows update cache folder) contents, enter the following commands
rmdir %systemroot%\SoftwareDistribution /S /Q
rmdir %systemroot%\system32\catroot2 /S /Q
Alternatively, you can go to C:\Windows\SoftwareDistribution and C:\Windows\System32\catroot2 and delete the contents of these folders manually.
3. Now, to start the Windows update services again, enter the following commands in the command prompt (admin)
net start bits
net start wuauserv
net start appidsvc
net start cryptsvc
Method 4: Check if Windows Modules Installer is running or not
Windows Modules Installer is a Windows service that is responsible for installation, modification, and removal of Windows updates and optional components. You should check whether its running or not because it is a crucial part of the Windows update.
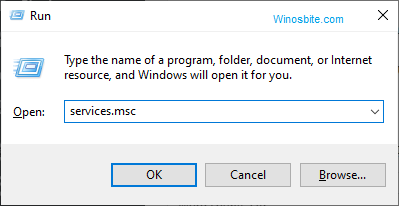
1. Press Windows + R simultaneously to open the Run application
2. Type in services.msc and press ENTER
3. In the list of services, look for Windows Modules Installer and double-click on it
4. If its Service Status shows Running close the Services application and try the next method; Else, click on the Start button and press OK.

Method 5 (a): Download and Install the updates without using Windows Update
Make sure that the update you were trying to download was not a feature update (Windows 10 version update). You can download normal KB (Knowledge Base) update manually using Microsoft’s update catalog. (If it failed to install a Windows 10 version update, you should skip this method to the next one)
First, check your system type-
1. Press Windows + I to go to Settings
2. Click on System

3. Click on About in the side panel
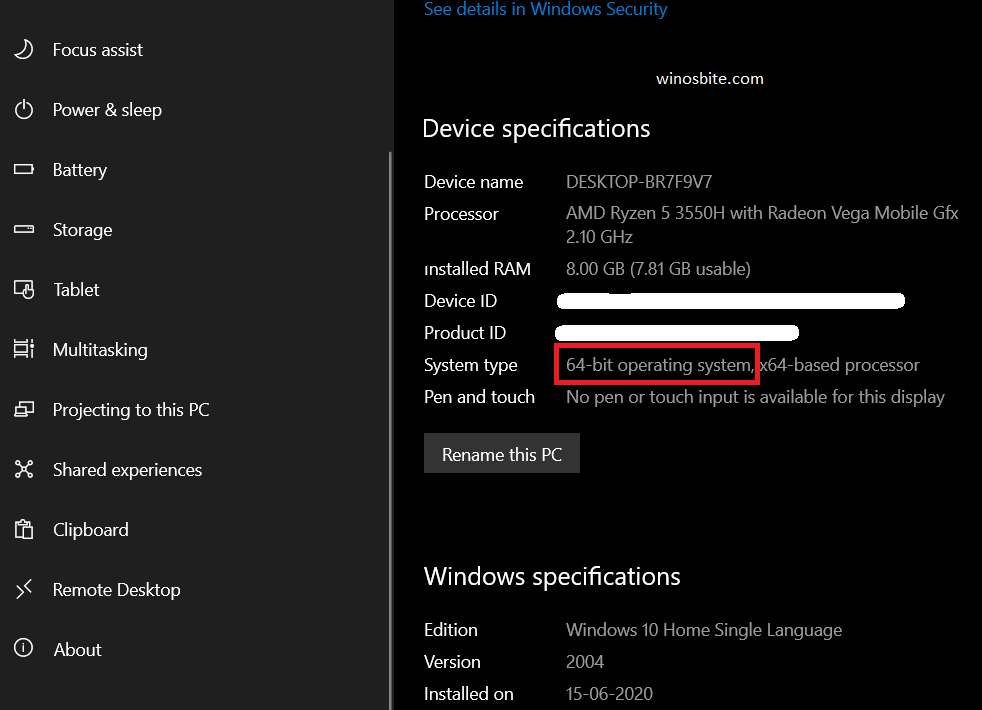
4. Note the system type (64 bit mean x64 system and 32 bit means x86 system).
Now to download the updates manually-
1. Go to settings by pressing Windows + I and click on Update and Security
2. Click on View update history and note the KB number of the failed updates, for example, look at this image

3. Go to this Microsoft Update catalog site: https://www.catalog.update.microsoft.com/Home.aspx
4. Enter the KB number of the update you want to download and choose the suitable version based on your system type (x64 or x86).

5. Install the .msu file and restart your system to apply the update.
Method 5 (b): Using the Windows Update Assistant
This method is for manually downloading a feature/version update for Windows 10.
1. Go to this Microsoft link
2. Click on Update Now
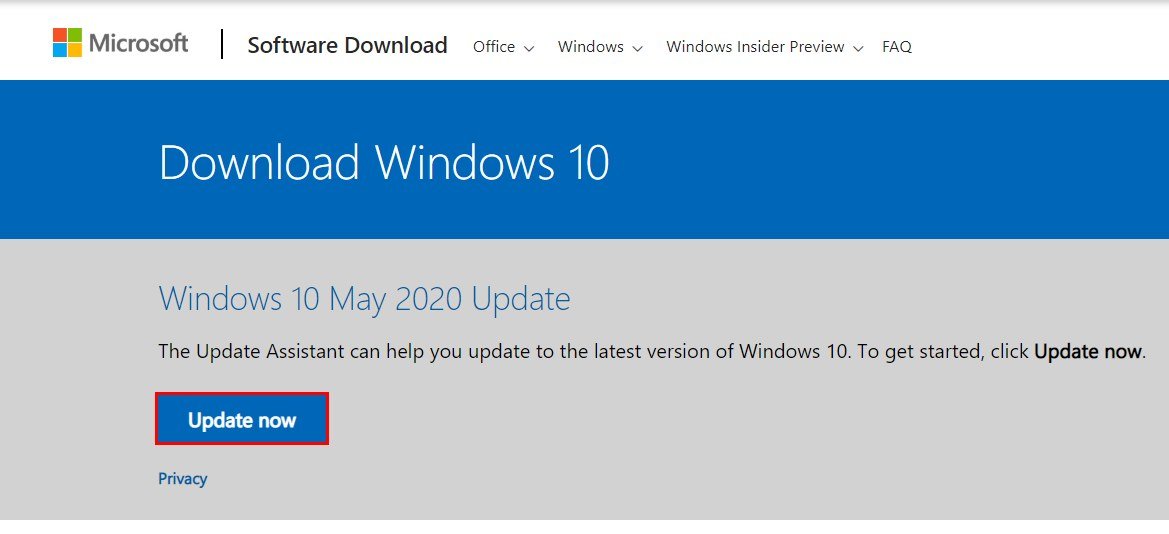
3. The update assistant will be downloaded. Open it, and proceed with the on-screen instructions in the application.
Method 6: Scanning your system with SFC and DISM
SFC (System File Checker) and DISM (Deployment Image Servicing and Management) are command-line tools that can scan and repair system files. We recommend using DISM just after SFC for effective results.
1. Open the command prompt as administrator by searching it in the start menu

2. Type the following command and press ENTER
sfc/scannow

3. Let SFC run, it will take a few minutes. After that, enter another command
DISM /Online /Cleanup-Image /RestoreHealth
4. The above command will run DISM, let it complete then close the command prompt.
Check if the problem is resolved.
Conclusion
I hope this article helped you in fixing the 0x8024a223 error. Kindly leave a comment or contact us in case you have queries or suggestions about this article.
