If you want to disable IPv6 on your Windows 10 computer then there are two simple ways to do that. One is using Network Settings and another via Regesitry edition option. On this page, I am going to show how you can disable IPv6 in less than one minute which works with Windows 7, 8 and 10.
In order to disable IPv6 on your Microsoft Windows 10, follow below-given steps:
Method I: Using Network Adapter
1) Go to the bottom right corner of your system and right-click on the Network/ Internet access icon.
2) From the pop-up menu, select Open Network and Sharing Center

3) Click once on Change adapter settings on the left side panel
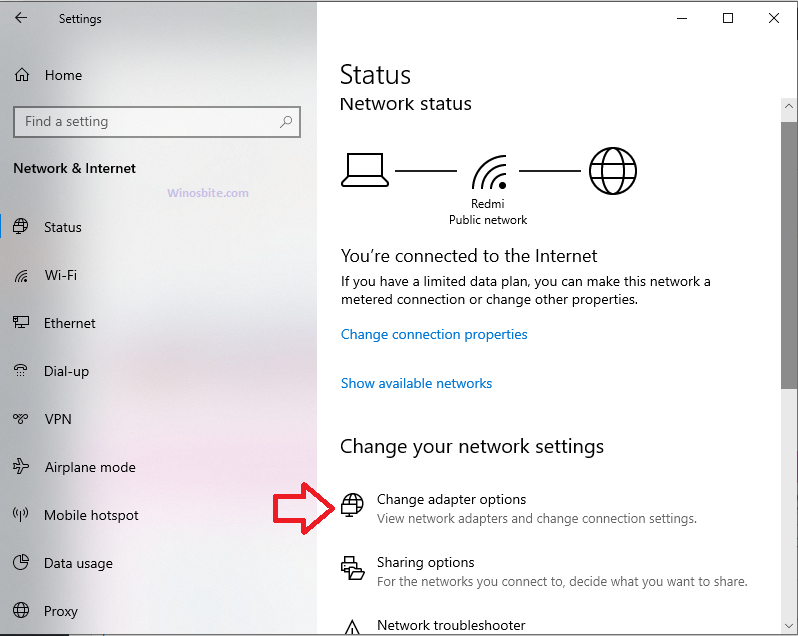
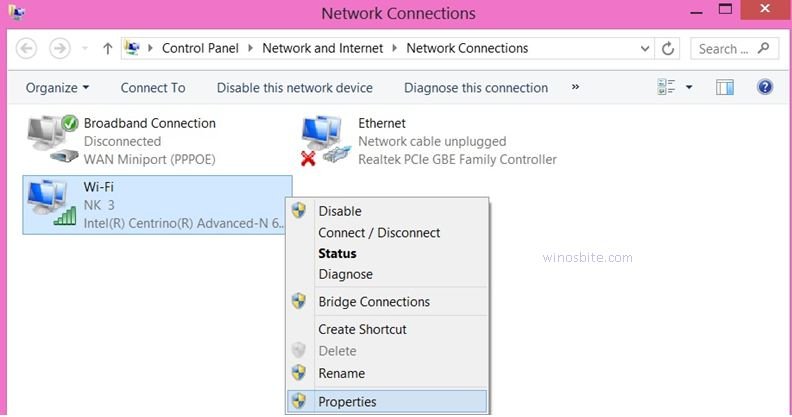
4) Now, select the current network connection type you use. If you use LAN connectivity, select Ethernet. For broadband connectivity, select Broadband and for wireless internet connection, select Wi-Fi. Then, Right-click on the selected network connection.
5) In the pop-up menu, select Properties
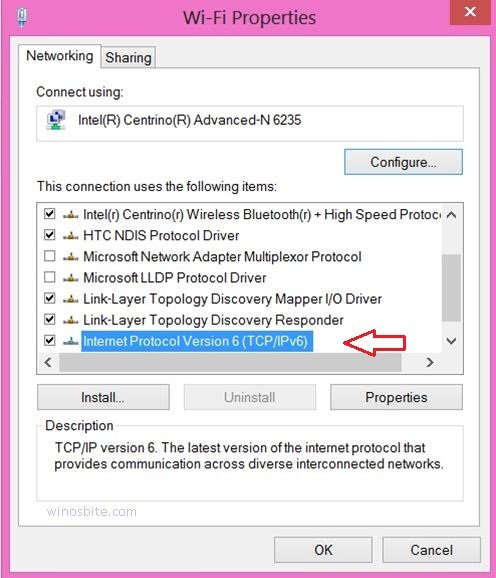
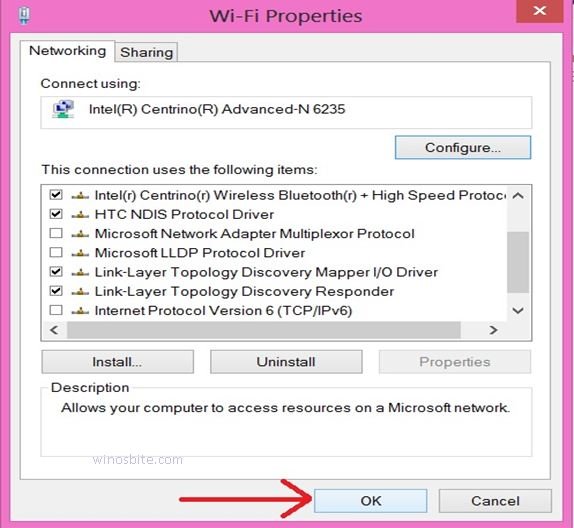
6) In the Properties window, go to the tab Networking, if not already selected by default
7) Scroll down and browse for Internet Protocol Version 6 (TCP/IPv6).
8) Uncheck the ticked box on the left side of it.
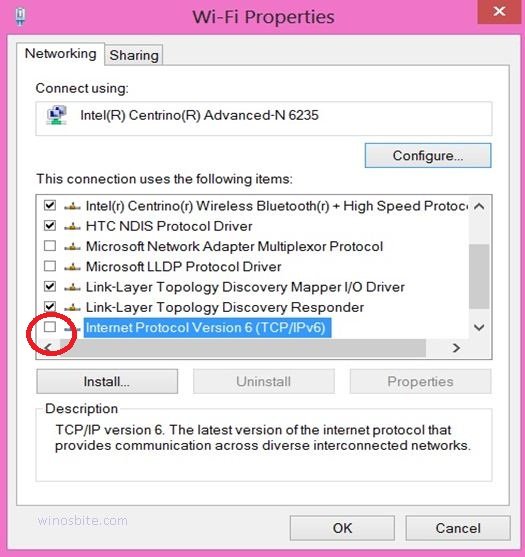
9) Click on OK
10) Close all windows and restart your system to save these changes.
This will disable the IPv6 from your system and IPv4 will be used by default.
Method II: Using Registry Editor
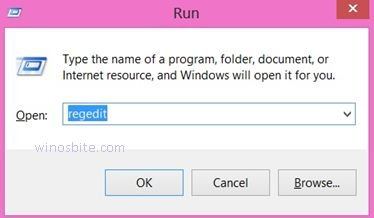
1) Press Windows and R key together to open the RUN toolbox
2) Type regedit in the box and click on OK
3) Select Yes, if the “User Account Control” dialogue box appears.
4) Go to the left panel of the Registry Editor window and expand the Computer by clicking on the arrow to its left.

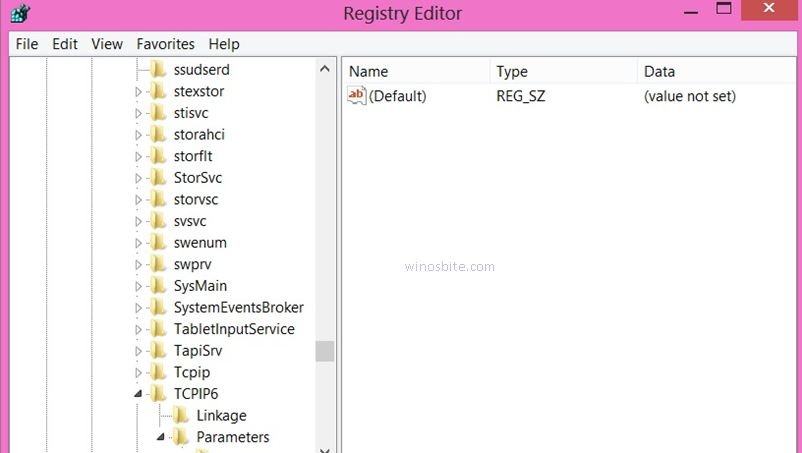
5) Go to HKEY_LOCAL_MACHINE > SYSTEM > CurrentControlSet > Services > TCPIP6 > Parameters sequentially.
6) Now, go to the right panel and right-click on an empty space. From the pop-up menu, click on New
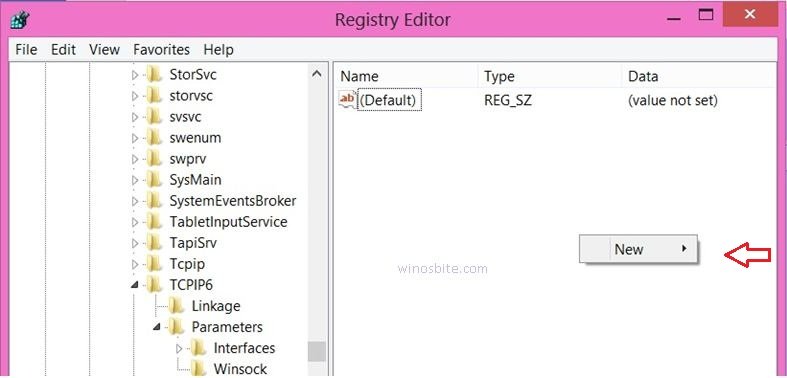
7) Then click on DWORD (32-bit) Value
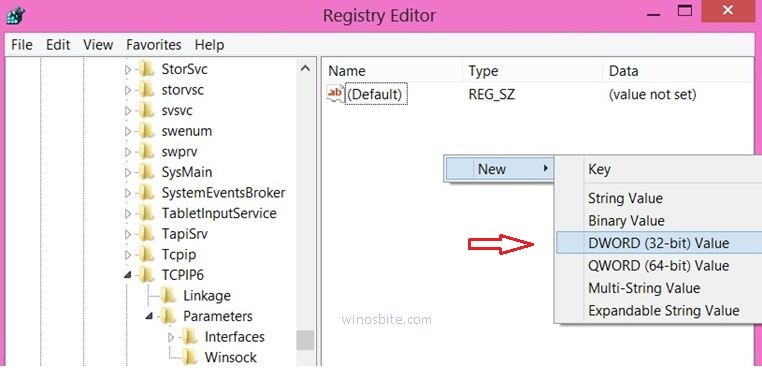
8) Rename the new value as DisabledComponents
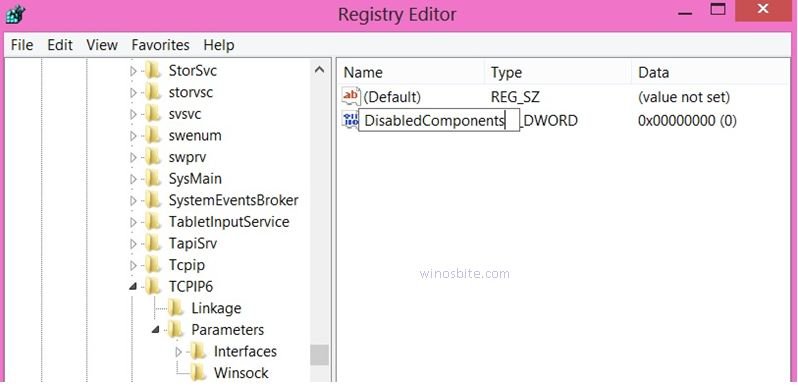
9) Now, right-click on DisabledComponents and click on Modify from the pop-up menu.
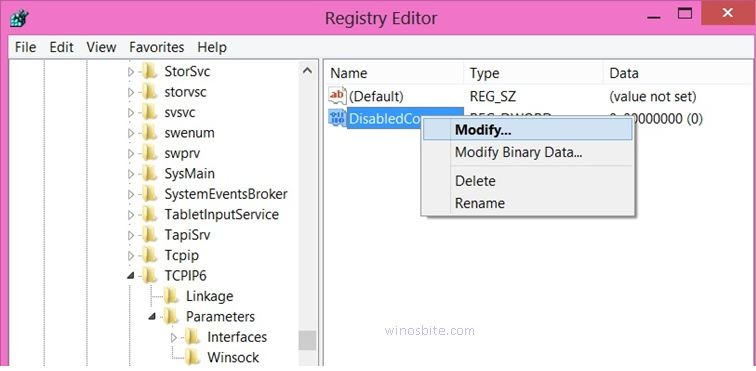
10) In the dialogue box, type either ffffffff or, 0xFF and select OK
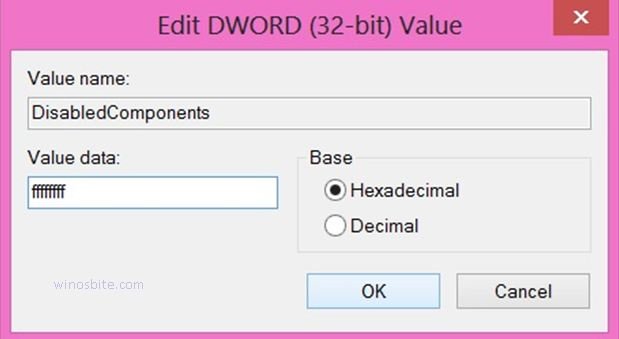
11) Close the Registry editor
Now, restart the computer to take effect and this will disable the IPv6 on your system.
You may also like reading:
Free Bandwidth Monitoring Tool
