The Wisptis.exe is a Microsoft Pen and Touch Input software component. The process usually comes to your Windows 10 when you installed MS Office 2003 or Adobe-related products. Obviously, wisptis.exe is not a virus and totally safe for Windows OS.

The full form of wisptis.exe is Windows Ink Services Platform Tablet Input Subsystem
Quick Overivew
What is it and its uses?
Wisptis.exe is the executable for any pen input device for the Microsoft Tablet PC Platform. It is a tool for Microsoft Office’s handwriting feature.
Windows Ink is specially designed for Windows 10 Operating System. It is a software suite that has several features and applications that facilitate pen computing. The software suite comprises Sticky Notes, Screen Sketch, and Sketchpad applications.
Wisptis.exe gets installed in the system by default whilst installing Microsoft Office 2003 (along with the newer Office versions), Journal Viewer, or any Adobe software.
File size and location
- The file size of Wisptis.exe is approximately 0.3 MB.
- The location pathway of Wisptis.exe is C:\Windows\System32\wisptis.
Quick Overview
| Filename: | wisptis.exe |
| File description: | Microsoft Pen and Touch Input Component |
| File version: | 6.1.7601.17514 |
| File Size: | 396 KB |
| Product name: | Microsoft® Windows® Operating System |
| File type: | Application |
| Copyright: | Microsoft Corporation |
| Language: | English |
How to disable wisptis.exe?
Wisptis.exe remains active and runs as a background process even when the touch screen or pen input is not being used by the system. The Wisptis.exe process can be terminated from the task manager but it is not a permanent solution as it automatically gets restored even if it is deleted or renamed. Windows File Protection enables it to be reinstalled at the time of the next system reboot or whenever Microsoft Office or Adobe Acrobat is opened.
Until then, the applications that utilize wisptis.exe are affected. Programs with any handwriting and/ or touch screen features like the Snipping Tool are also affected. Otherwise, Windows functions normally.
If the user does not have a Tablet PC, is not using any pen input component, and does not want unnecessary processes engaging the limited resources available, then any of the following suitable methods can be used to ensure that wisptis.exe remains disabled:
Method I: Using Command Prompt
1) Click on the Windows logo and type CMD
2) Now, Right-click on Command Prompt and select Run as Administrator

3) Now enter the following commands sequentially and press the Enter key after each one of them :
%systemdrive%
cd %windir%\system32
takeown /f wisptis.exe
icacls wisptis.exe /deny “NT AUTHORITY\SYSTEM”:(RX)
4) Now, Reboot the system.
This will disable the wisptis.exe from auto-start in Windows System.
Method II: Disabling the AppVClient
The Microsoft App-V Client Service is a utility that manages the Microsoft Application Virtualization (App-V) users. Disabling this particular process prevents the wisptis.exe process from reinitiating. The steps to stop the automatic start of wisptis.exe are:
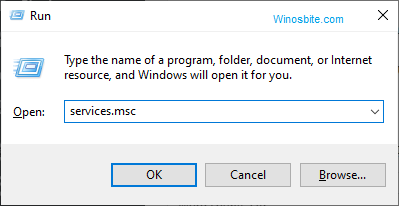
1) Press Windows + R keys together to open RUN
2) Type Services.MSc and press the Enter key

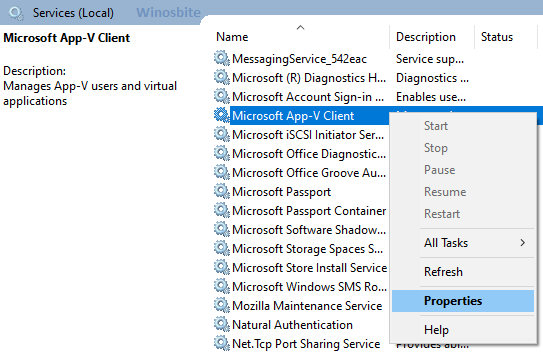
3) Locate Microsoft App-V Client & Right-click on it to select Properties.

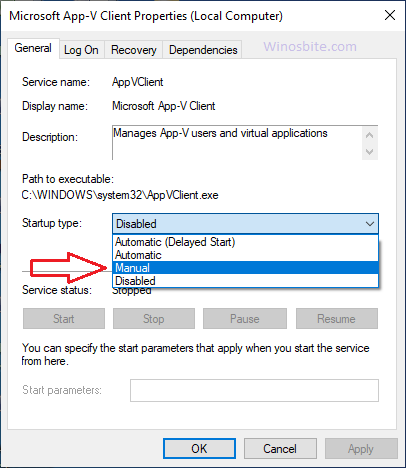
4) Under the General tab, locate “Startup type” and choose the Manual option.

5) Click on the Stop button under the “Service Status” option to immediately stop the service from running.
This is optional as wisptis.exe will be prevented from running after the next reboot anyway once the Startup type has been changed to Manual.
6) Click on Apply and then on OK.
This will terminate AppVStreamingUX.exe (process for the AppVClient) which in-turn disables wisptis.exe.
Method III: Using the Local Group Policy Editor
Wisptis.exe has high CPU usage. Therefore, using the disallow option for it in the Local Group Policy Editor prevents any over-usage of system resources. The steps to prevent wisptis.exe from running via this method are as follows:
1) Open the Run window by pressing Windows + R keys together
2) Type gpedit.msc in the Run box and press the Enter key
3) On the left panel of the Local Group Policy Editor, go to Computer Configuration -> Windows Settings -> Security Settings -> Software Restriction Policies -> Additional Rules
4) Right-click on Additional Rules and choose New Path Rule
5) In the New Path Rule window, go to the location of wisptis.exe (C:\Windows\System32\wisptis.exe) by using the Browse button.
6) After the Path box displays the desired location, set the drop-down menu under the Security level to Disallowed.
7) Click on Apply.
You are done, now, the Wisptis.exe won’t be running.

