
Are you experiencing system slowness or lag? One probable reason affecting your system speed could be the accumulation of temp files. Hence, the first thing that anybody would recommend you to do is to delete temp files from the system to enhance your system performance.
Here, we would tell you what temporary files are and how to remove temp files from your Windows 10 system.
What are temp files and why you should remove them?
Windows OS and various other applications of the system create temporary files for various reasons. These are created for temporary purposes which should ideally be deleted by the process which created it. However, sometimes it doesn’t so happen, and these keep accumulating in the machine and keep utilizing the system resources.
Temp files could be created:
- For making free space for the sake of virtual memory.
- For creating backup data files.
- When running apps need some space to contain larger amounts of processed data.
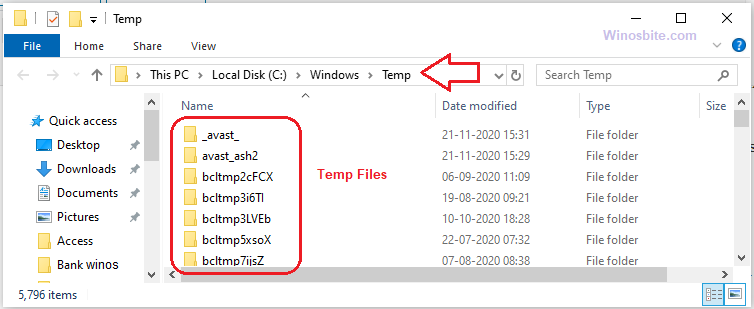
Temporary files can be identified with the suffix of .tmp or prefix of tilde (~). Temp files are located in the Windows Temp folder mostly.
Deleting temporary files is recommended for the following reasons:
- To increase the disk storage space – Over time temp files can occupy a huge amount of storage space on a hard-drive. You may use tools to analyze free hard drive space.
- To improve the system performance – If temporary files are present in the system, each time they would be loaded and processed while the particular application is running. This terribly impacts PC performance and leads to system lag.
Thus, it is advised to clean temp files from the PC or laptop from time to time in order to avoid system lags and save storage space for necessary items.
Before mentioning the steps, we will discuss where you can find temp files.
Quick Overivew
Temp file locations
There are few ways to open the Temporary folder on the Windows system:
Method 1: Temp files created by the Operating System can be found in C: > Windows > Temp.
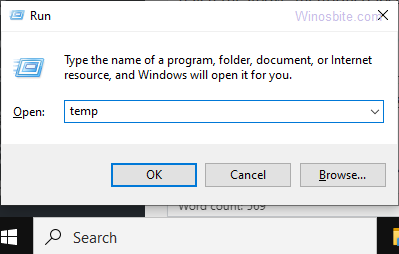
Method 2: You can also use the run command to open the Temp directory.
- Press the Windows key + R key
- Type temp in the dialog box
- Hit the Enter key to reach the above-mentioned location.
- Temp files created by apps can be found in C:\Users\PC\AppData\Local\Temp.
This location may vary sometimes from system to system but to get to this location correctly, you can just type “%temp%” in the Windows Start Menu search box and hit Enter. It will directly take you to the desired location.
How to delete temp files on Windows 10?
You can follow the below steps to remove temp files from the system.
Steps to delete user Temp files:
- Press the Windows button
- Type %temp% in the Windows Start Menu search box and press the Enter key
- Press Ctrl+A button
- Now press the Shift + Del key to permanently delete all the files.

You may notice some files will not get deleted automatically. For these files, you will get a prompt with a message that they are currently in use. Hence, you can press the “Skip” button for such files.
You can wait for some time until the entire process is completed and close the temp folder afterward.
Remove Temp files using CCleaner
There are few reliable 3rd party tools like CCleaner that can remove all types of Temporary files, Folders, and Junk Files from Windows PC. Here are the steps:
1) Launch the CCleaner
2) Click on Custom Clean from the left-hand side

3) Make sure which types of temp files you want to remove from the check box list
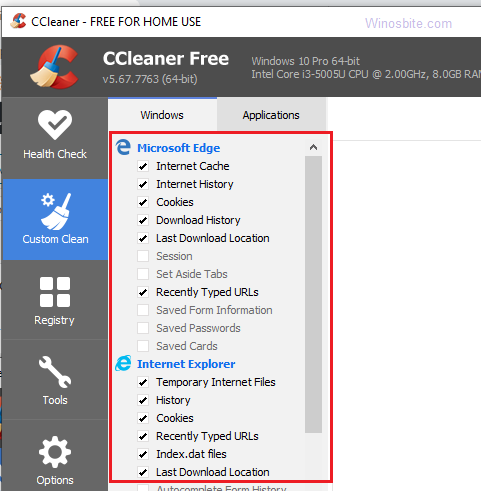
4) Click on Run Cleaner

Wait for about a minute to clean all temp files and folders and you are done.
Final Words
Removing temporary and junk files are easy. All you have to follow the above-given steps. This will improve the performance of your Windows 10 computer immensely.
Other useful tools:

