
Several Windows 10 users have been revealing that the Windows update error 0x80070003 in which the update had stopped at around half and gives them the Error 0x80070003.
It will show an error message that says:
“Feature update to Windows 10, version 1803 – Error 0x8007003”

Encountering issues with Windows updates are normal and it is often easy to fix therefore you need not stress over it. I have given a detailed description of Windows Update Error 0x80070003 and all the strategies to fix it.
Reasons for Windows Update Error 0x80070003
The main reasons for the error are as follows :
- Due to the corrupted system files
- Windows account gets corrupted
- superfluous accumulated Cache
- corrupted system files
- ongoing patch update
You must read all the approaches which I have mentioned below and see if any approach works in your case.
Quick Overivew
By using the Windows Update Troubleshooter
We should start just by guaranteeing that your Windows Operating System isn’t set up to manage this issue normally. Windows Update Troubleshooter can be utilized to address and fix any updates related error. All you need is to have appropriate net availability and follow the beneath steps.
1) Click on the Windows logo, type Troubleshoot, and click on it.

2) Now in the Troubleshoot settings, scroll down to the Windows Update option and click on it.

3) Now click on the Run the troubleshooter button that is located under Windows Update

This will consequently check for any potential errors and fix them.
4) Reboot your system.
I hope this approach works for you and on the off chance that it doesn’t please follow the following approach.
Restart the Windows update using the command prompt
We can also use the Command Prompt in order to fix the Windows Update Error 0x80070003. Follow the steps to complete this approach.
1) Click on the Windows button, type command prompt, and then choose Run as administrator

3. Now in the command prompt, type or just copy the code and enter it one by one
net stop wuauserv

ren c:\windows\SoftwareDistribution software distribution.old

net start wuauserv

exit
4) Now restart the system.
That’s it now just try to update your windows again, I hope this method works and you will never encounter the Error 0x80070003.
Run the SFC command to repair corrupt files
Corrupted system files can also serve as the reason behind Windows Update Error 0x80070003. So using SFC you can repair the corrupted system files.
Note: The System File Checker commonly abbreviated as SFC is a utility available in every new version of windows. It helps every user to scan, restore, and fix corrupted system files of Windows operating system.
Follow the steps which I have mentioned below to effectively complete this approach.
1) Type cmd in the Windows search box
2) Press Ctrl + Shift + Enter to run Command prompt as administrator.
3) A pop-up window will open, click on Yes
4) Now after the Command Prompt application starts just copy or type sfc/scannow in the command prompt space as shown below and hit Enter.
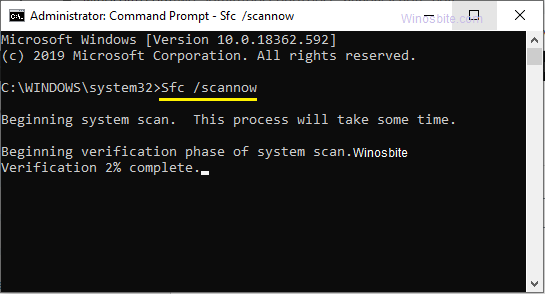
This typically takes 10-16 minutes to complete the entire scanning and fixing process, so stand by likewise.
5. Restart your PC to consolidate the ongoing changes.
That’s it now again try to update your Windows and see if you still face Windows Update Error 0x80070003. In case you still experience this error go on with the next few approaches.
By restarting the Windows Update service manually
To restart the Windows Update service follow the steps in exactly the same order as given below.
1) Press Windows button + R from your keyboard
2) Now type service.msc and hit Enter from your keyboard.

3) Now in the Services window, you have to find the Windows Update
Note: All the services are listed in the reverse alphabetical order so finding the Windows Update service would not be big deal.
4) After you find the Windows Update service, right-click on it and click on the Stop option as shown below.

5), Now again, right-click over Windows Update and click on Restart
That’s all you have to do in this approach, I hope this approach works in your situation and probably you would never experience the error again.
Launch DISM command
Windows 10 has an inbuilt feature called DISM that can be launched using a command-line. This handy tool is used to repair any damaged Windows Image.
1) Press the Windows button, type Command Prompt and choose Run as administrator
2) Now type below command line and hit the Enter button
Dism /Online /Cleanup-Image /ScanHealth
3) Once the above command has been executed successfully then type the below command and hit the Enter key
Dism /Online /Cleanup-Image /RestoreHealth
4) Now, wait for 10-15 minutes to finish the process.
5) Now, restart the Windows PC and run the Windows update.
Reset Spupdsvc.exe
This Spupdsvc.exe is an essential file of the operating system and is used to updates the Windows OS. Sometimes, if this file is corrupted then you may encounter 0x80244018. Here are the steps to reset it:
1) Press the Windows logo, type command prompt, and choose Run as Administrator
2) Now type the below command and hit the enter button
cmd /c ren %systemroot%\System32\Spupdsvc.exe Spupdsvc.old
3) Now this will replace the existing Spupdsvc.exe file with a brand new one.
Now restart the system and run the Windows update.
By getting rid of the update that triggers the 0x80244018 error
This approach is not one of the preferred approaches however this approach will definitely help you to fix the issue.
Follow the steps to get rid of the error.
1) Left-click on the Start button then, choose the Settings option.

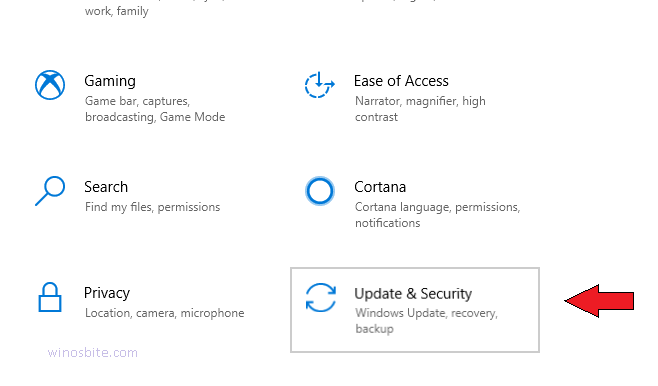
2) Select the Update and Security
3) Now in the update and security section, open Advanced Options as shown below.

4) Now you need to go to the Update history and select Uninstall Updates.
5) Now simply choose the updates that trigger the 0x80244018 error and click on
6) Now simply Restart your PC to complete this method successfully.
Final Word
Always keep your Windows 10 PC up-to-date by downloading the latest updates. Install a good antivirus and clean the system time-to-time to maintain your PC in the optimum stage.

