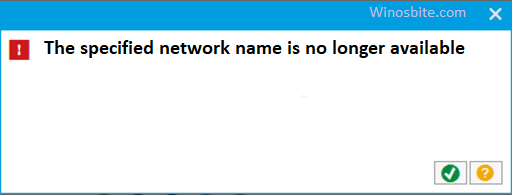
If you have started receiving error code 0x80010108 on your Windows 10 that means something is stopping your system to install the update from Microsoft. This error usually starts when wups2.dll file corrupt or system date is not correct.
In this post, I have provided a few best possible ways to fix error code 0x80010108 on the Windows OS.

Usually, the error code 0x80010108 occurs when you try to:
- Update your Windows 10 operating system
- Update Windows Store apps
- Play music or videos
- Open photos
Once this error occurs, it hinders in downloading or installing of any apps and also in opening photos, music and videos. It can occur due to corrupt Windows update components or applications.
The error message received by the user is:
Try that again. Something went wrong. The error code is 0x80010108, in case you need it.
fbl_impressive 10049 Enterprise – Error 0x80010108
Quick Overivew
Fix Windows Update Error 0x80010108
There are 8 ways to fix error 0x80010108 in Windows 10:
Using wsreset.exe
This step is pretty simple, this will clear the Windows Store cache:
1) Press Windows+ R keys
2) Type wsreset.exe and click on OK

This will reset your Windows Store cache. Reboot your system to save the changes.
Restarting Windows Update Service
1) Click on the Start button and type CMD
2) Right-click on Command prompt and select Run as administrator

3) Type below text one after another and press Enter key. This will restart the Windows Update Service.
net start wuauserv
net start trustedinstaller
net start bits
Now, restart your system.
Check Date & Time Settings
1) Go to the bottom right corner of your screen and right-click on the time and date bar.
2) Select Adjust date/time
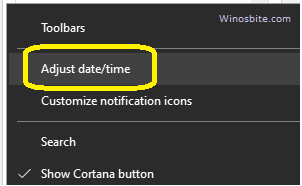
3) Turn Set time automatically to Off and then turn it back On

Restart your system.
Using sfc /scannow
As said above, if an essential system file is corrupted then this error 0x80010108 may appear. Thus, a complete scan and fix is recommended.
1) Click on Windows button, type command, right-click on it and choose Run as administrator
2) Type below text and press the enter key.
sfc /scannow

Once the scan is complete, close the command prompt
Clean Boot Using Msconfig
Sometime, when a third-party tool installed on the system, then they create issues. Therefore a Clean Boot is required so that the Windows can install the latest update from the Microsoft server without having any issue.
1) Press Windows + R button
2) Type MSConfig and click on OK
3) Go to the Services
4) Check the box beside Hide all Microsoft services and select Disable all
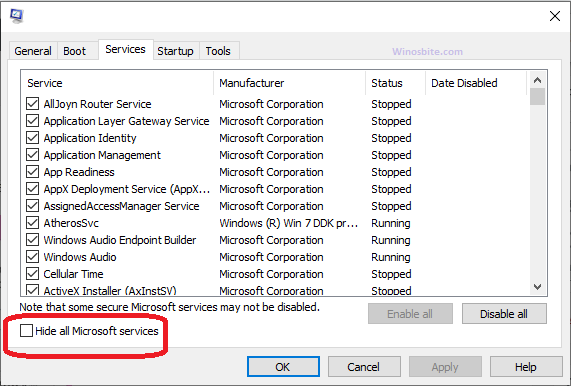
5) Click on Apply and then OK
Reboot your system and follow steps 1 to 3.
6) Then, check the box beside Hide all Microsoft services and select Enable all
7) Click on Apply and then OK
Restart your system.
Enable User Account Control
This is a handy tool that comes with Windows 10. When a third-party tool tries to make any changes on your PC, then it will send you a notification to approve or discard. Thus, enabling user account control may fix error 0x80010108. Follow the below steps to enable this:
1) Click on the start button, type CPL and click on it

2) Click on User Accounts.
3) Click on User Accounts again in the next window
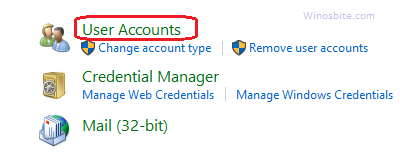
4) Now, click on Change User Account Control settings
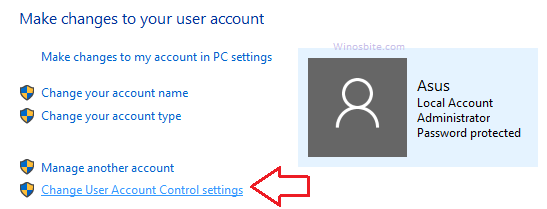
5) Drag the vertical bar to Always notify in the UAC Settings window.
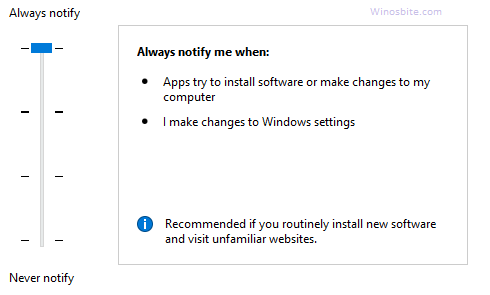
6) Click on OK
You are done!
Flush the DNS cache
Sometimes the DNS may create the issue and cause 0x80010108 error on the system. In that case, it is recommended to clean the DNS cache. Here are the steps to Flush the DNS cache:
1) Click on Windows button, type Command prompt
3) Right-click on it and select the first option Run as administrator
3) Now, type below command and press enter button
ipconfig /flushdns
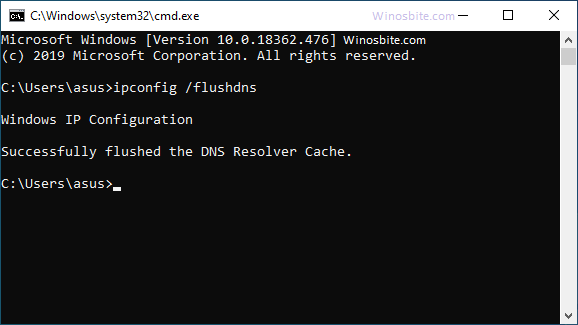
It will show a message like “Successfully flushed the DNS Resolver Cache”
Now, close the command prompt window and restart the PC.
Turn Off Proxy Using Internet Properties
If you have enabled proxy on your system then your system may not be able to download the latest update. Disabling proxy will fix the error, here are the steps:
1) Press Windows+ R keys together
2) Type Inetcpl.cpl and hit Enter
3) Go to the Connections tab and click on LAN settings

4) Check the radio button Automatically detect settings

5) Click on OK and close Internet properties.
Restart your system.
So, these are the simple ways to fix Error 0x80010108 on your Windows 10. If you have used any other ways to solve this problem then please let me know by leaving your comment.
Other similar error:

