If you are using a Windows and wondering how to enable the Active Directory for administrative purpose then you will have to install few software. Because the Active Directory tool is not available on Windows system. The Windows operating system is currently one of the most used user-friendly operating systems. Apart from its neat and clean user interface, it also provides some professional tools and services. One such service is Windows Active Directory which is utilized to manage and connect to servers, this tool is very useful for professionals.
Despite being a Windows tool Active Directory does not come preloaded with your Windows system especially if you are not using the professional Windows edition. However, you can still use this tool on your Windows PC. I have briefly mentioned how you can enable Active Directory on Windows 10, so go through the article if you need to install/enable the Active Directory.
Steps for installation of Remote Server Administration Tools
The very first step is to install a Remote Server Administration tools from the official site of Microsoft Windows.
Note: Make sure you have good internet connection to download the file.
1. Launch your default Windows browser on your PC.
2. Now to go microsoft.com/en-us/download/details.aspx?id=45520
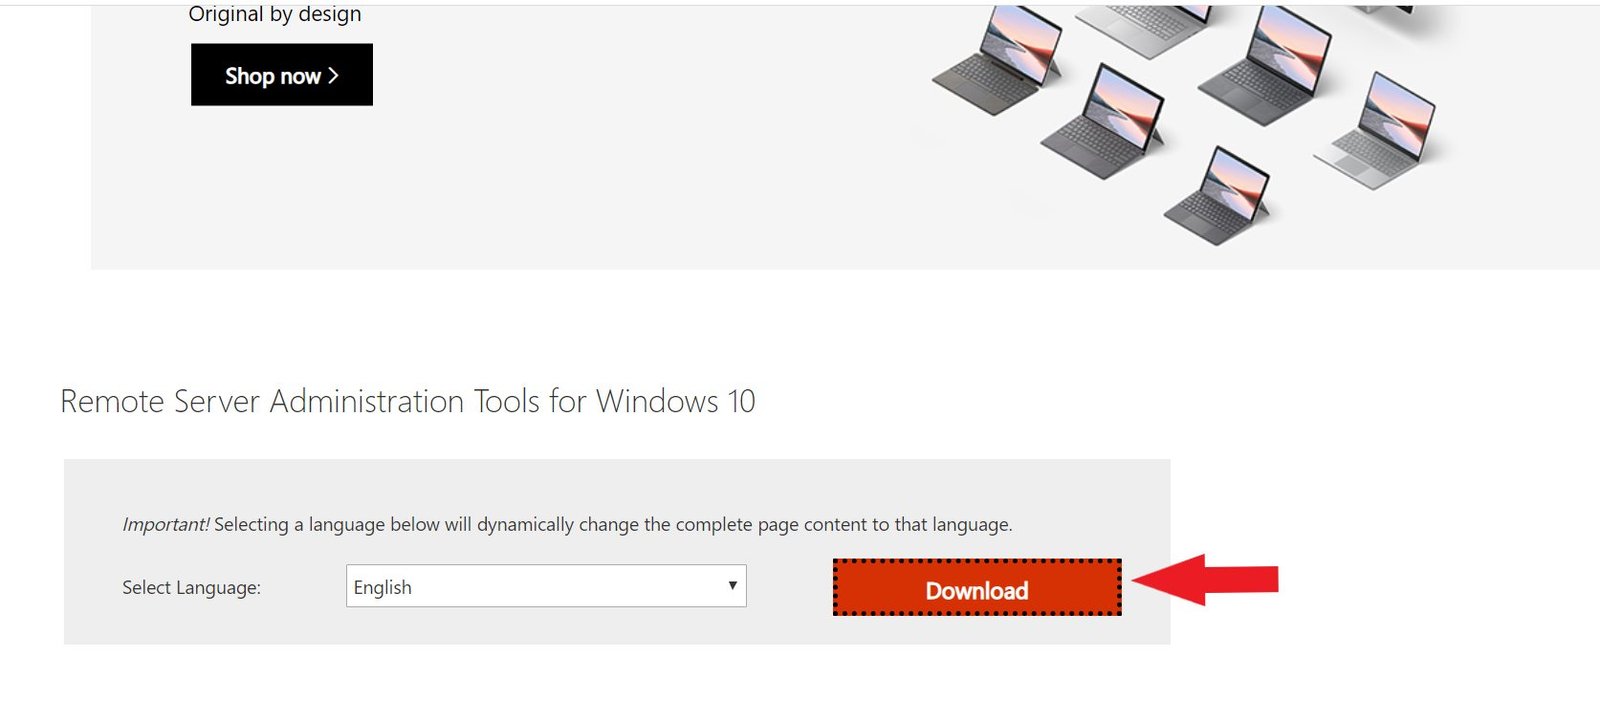
3. Now scroll down a while until you see the red Download button as shown below.

4. Click on the Download button.
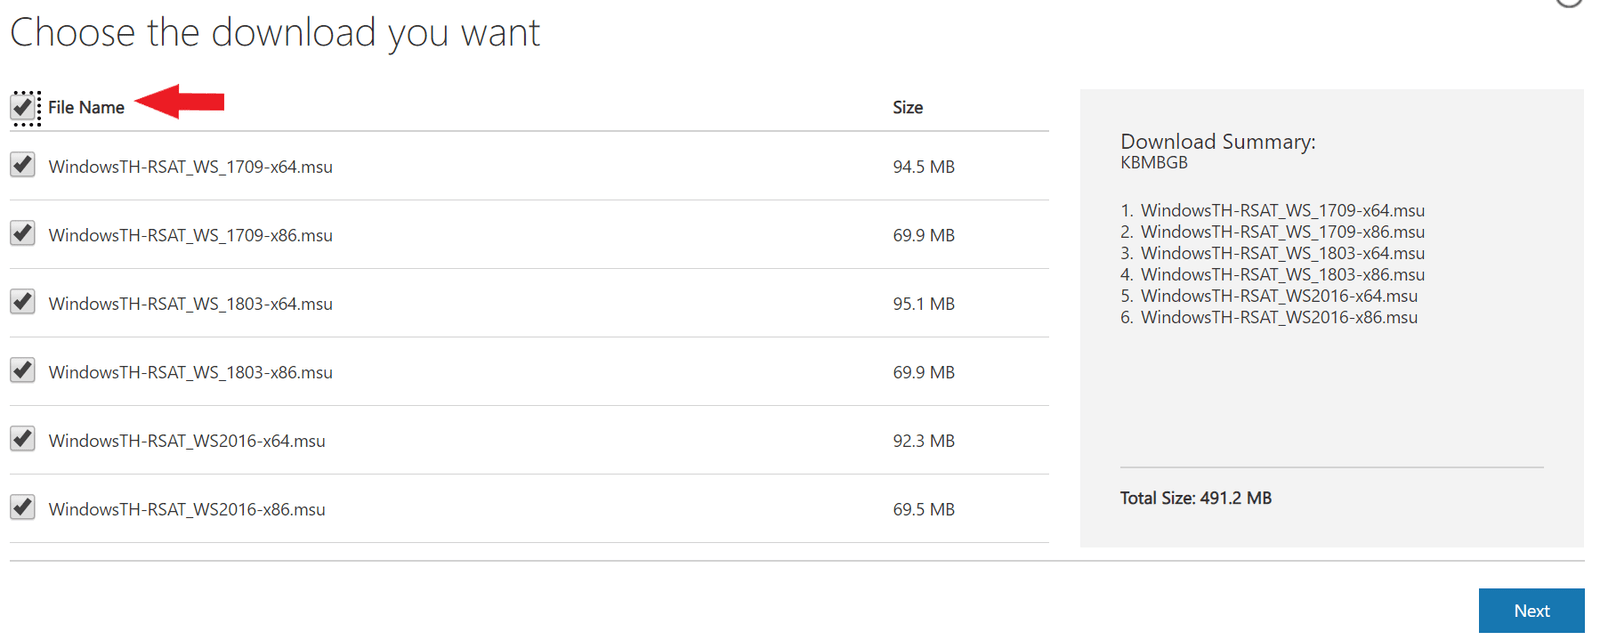
5. Next click on the box saying Filename.

6. Now click on the Next button.
7. Now you need to wait unless the file is successfully downloaded.
8. Locate the files in your system.
9. Now install all the 4 different files you just downloaded.
That’s it you have passed the first level by successfully installed all the Remote Server Administrator tools which are required to activate/enable Active Directory.
Here is how to use run command for active directory.
How to Activate Active Directory?

Now after installing the Remote Server Administrator tool, follow the below steps for activating the Active Directory:
1) Press Windows + R button, type Control and hit Enter button
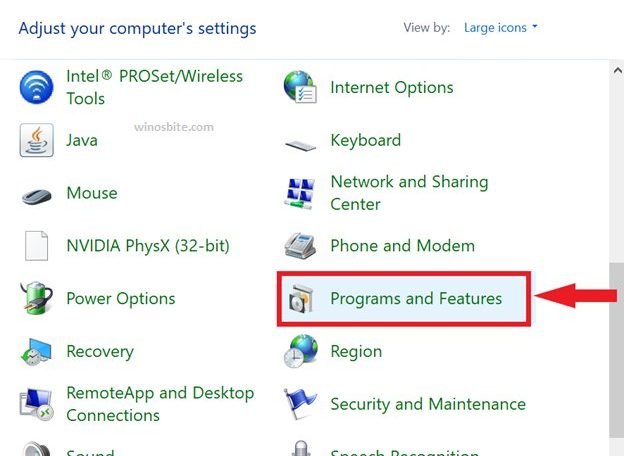
2) Click on Move mouse over View by: and choose Large icons
![]()
3) Now select the Programs and Features section in the control panel window.

4) Now click on the option saying Turn Windows Features on or off, located on the left-hand-side
5) Now in the pop dialog box find Remote Server administrator tools.
6) Click on the ‘+’ sign before the Remote Server administrator tools.
7) Now in the expanded list of tools click the ‘+’ sign before Role Administration Tools.
8) Now check the box of AD DS Tools
9) Now your Windows system will install some files.
10) After the installation process is complete you will get Restart Now button, click on it.
That’s it now let your system start, hopefully, the Active Directory tool is enabled and hence you can use it without any hassle.
Hope the above post will help you to activate the Active Directory. In case you are facing any issue while enabling the Active Directory, then you can comment below and let us know your problem.
Read next:

