
On the off chance that you have a printer in Windows 10 that you at this point don’t need to be added, at that point you can remove the printer from your windows system. There are several methods that can be used to remove printers from your system.
This guide will help you in removing the printer from your Windows 10 computer.
Quick Overivew
Method 1: Remove printer using Settings
Follow the steps mentioned below to remove the printer from your computer using Settings. You can watch this video too if don’t want to read the steps:
- Press the Windows button and then type Settings.
- Now click on the gear icon
- Now click on the Devices section.
- Next, you need to click on Printers & Scanners.
- Now among the list select the printer which you prefer to remove and then after selecting it just click on the Remove device button.

- Now you just need to click on Yes so as to confirm your choice.
Now if you have performed the steps as directed above, then hopefully your Printer will be removed successfully from your Windows PC.
Method 2: Remove printer using Control Panel
Follow the steps mentioned below so as to remove the printer from your computer using Control Panel.
- Press the Windows + R button
- Type Control and hit the Enter button
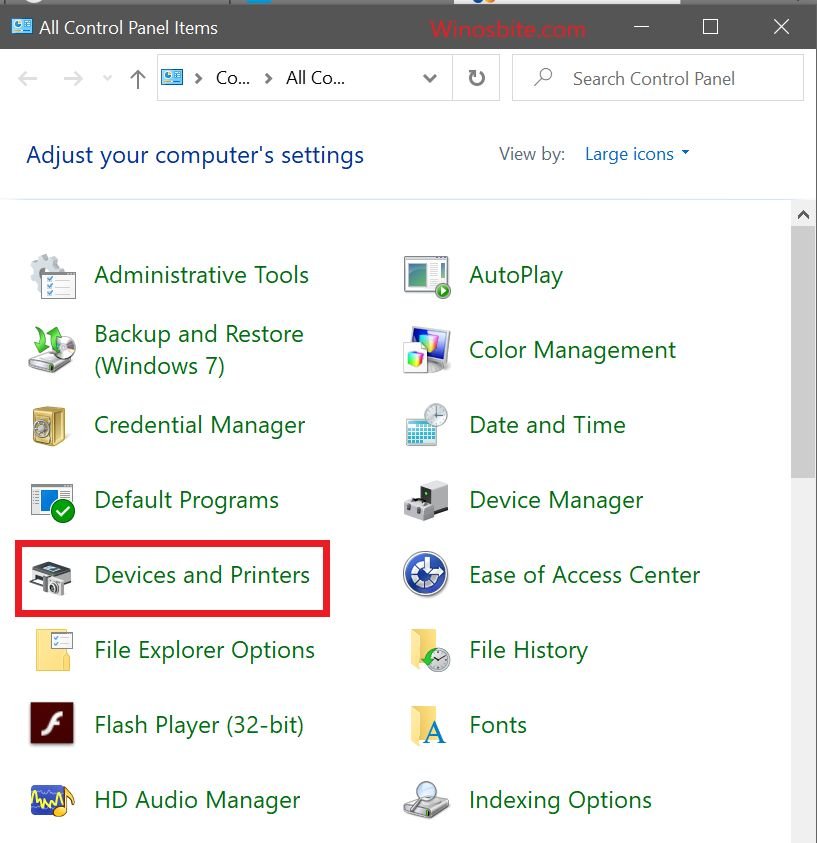
- Now open the Devices and Printers section by right-clicking on it.

- Next right click on the Printer you prefer to remove (e.g. in my case, it is AnyDesk Printer) and then click on Remove device as shown below.
- Now you need to click on the Yes button so as to confirm.
- Now you can close the Control Panel application.


Now if you have performed the steps as directed above, then hopefully your Printer will be removed successfully from your Windows PC.
Method 3: Remove the printer from the Printers folder
Follow the steps mentioned below so as to remove the printer from your computer using the Printers folder.
- Press the Windows + R button simultaneously from your keyboard in order to launch the RUN application.
- Now in the search space of the RUN application type ”explorer shell:::{2227A280-3AEA-1069-A2DE-08002B30309D}” and hit the Enter key.
- Next right-click on the printer you want to remove and then click on Delete as shown below.
- Now you need to click on the Yes button so as to confirm.
- Exit the Printers folder.


Now if you have performed the steps as directed above, then hopefully your Printer will be removed successfully from your Windows PC.
Method 4: Remove the printer from Device Manager
Here is how you can remove the printer from your computer using Control Panel.
- Press the Windows + R button simultaneously from your keyboard in order to launch the RUN application.
- Now in the search space of the RUN application type ”control” and hit the Enter key so as to launch the Control Panel application.
- Now open the Device Manager section by right-clicking on it.
- Next, expand the Printers/Print queues section.
- Now among the list of printers right-click on the one which you want to remove, and then select the Uninstall device option as shown below.
- Now click on the Uninstall button so as to successfully remove the Printer from your computer.
- Now just exit the Device Manager.


Now if you have performed the steps as directed above, then hopefully your Printer will be removed successfully from your Windows PC.
Method 5: Remove the printer using the command line
Follow the steps mentioned below so as to remove the printer from your computer using Command-Line.
- Press the Windows button and type ”Command Prompt”.
- Now right-click on the Command Prompt icon and select the ”Run as Administrator” option.
- Now in the space of the Command prompt type or copy the command ”wmic printer get name” and press the Enter key.
- Now you will be seeing a list of Printers, now I would further suggest you make a note or copy the name of the printer which you want to remove.
- Now type or copy the command printui.exe /dl /n “Printer name” and hit Enter.
- Now you can exit the Command Prompt.

Now if you have performed the steps as directed above, then hopefully your Printer will be removed successfully from your Windows PC.
Well, that is it I hope you discover my article valuable. Please comment below and let us know if you encounter any trouble while removing the Printer from your computer using any of the above-mentioned methods.
Also read:

