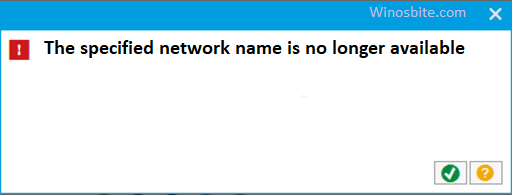
In case you are encountering 0xa00f4292 error on your Windows PC while trying to access the camera, then there is nothing to worry about, as this is a very common Windows error and can be easily fixed. Peruse this post to find out about the 0xa00f4292 error and the methods to get rid of it.
Quick Overivew
What is Windows Camera Error Code 0xa00f4292?
The error 0Xa00f4292 shows up when you try to access your Windows camera. Well, there can be numerous reasons that may pop up the 0Xa00f4292 error in your Windows 10, and few of these reasons are as follows.
- Windows Defender Firewall prevents the camera from functioning appropriately.
- Camera access is denied on your Windows system.
- The camera Driver is outdated.
- Recently installed Windows update.
- The files related to the camera are corrupted or went missing.
Well now when you have a clear understanding about the reasons that can trigger the 0Xa00f4292 error, it’s time to fix it.
Methods to fix Windows Camera error code 0xa00f4292
I have mentioned some of the easiest and best methods to resolve the 0xa00f4292 error, try the methods and see if it helps or not.
Allow the camera from the Windows Defender Firewall
Sometimes the camera is not allowed through the Windows Defender Firewall, and hence when you try to access your camera, the 0xa00f4292 error shows up. So to fix it we can allow the camera through the Windows Defender firewall, here is how you can do so.
1. Press the Windows + R button together
2. Now type Control and hit the Enter button
3. Next, set the View by to Small icons
![]()
4. Next, find Windows Defender Firewall.
5. Click on Windows Defender Firewall.
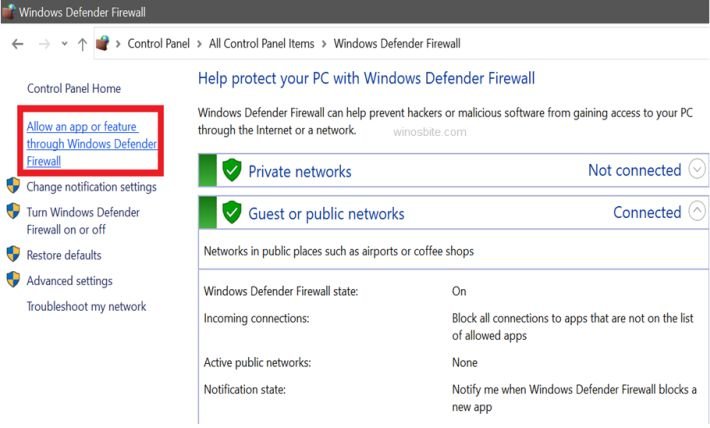
6. Now click on “Allow an app or feature through Windows Defender Firewall” located at the top left corner as shown below:
7. Now among the Allowed apps and features find Windows Camera.
No, if both the Private and Public are not checked for Windows Camera then check the box and then exit the Control Panel, conversely if the Private and Public is already checked then continue following the steps mentioned below.
8. Click on Change Settings.
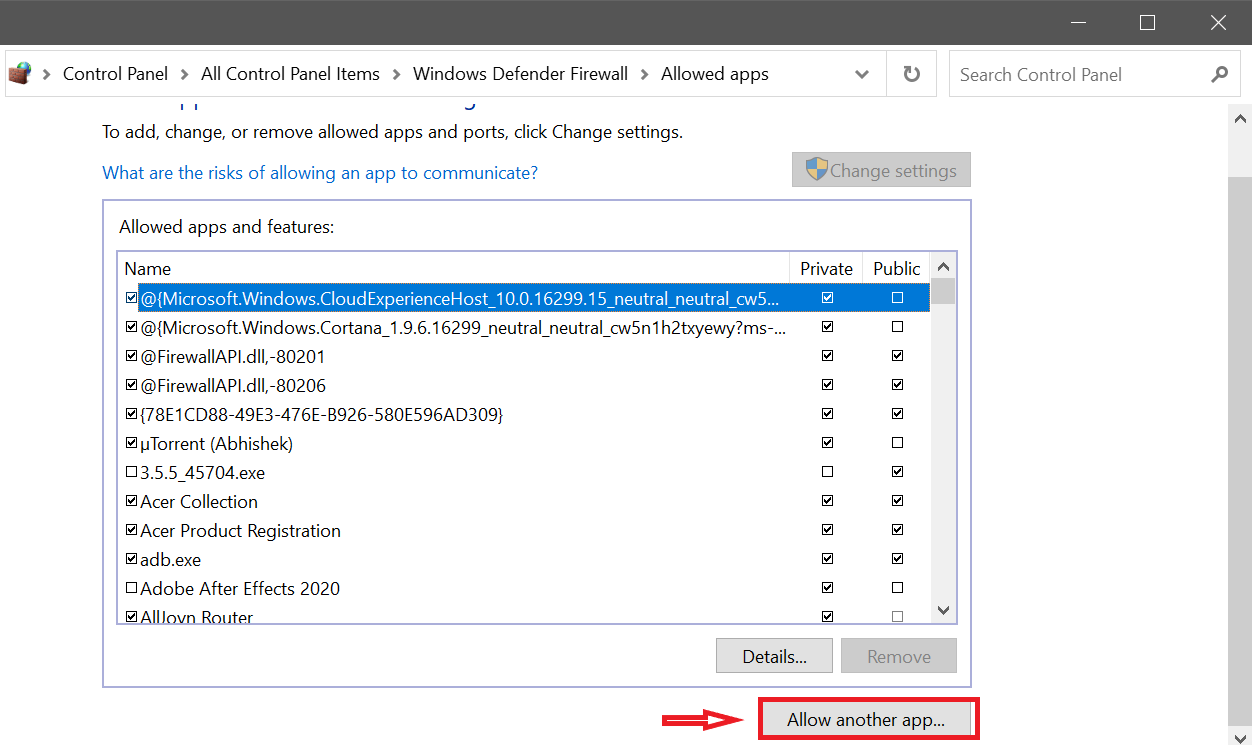
9. Next, click on Allow another app
10. Now in the Add an app pop-up window click on Browse.
11. Next, go to C:\Windows\System32\ and search for the camera in the search bar.
12. Next click on CameraSettingsUIHost.exe.
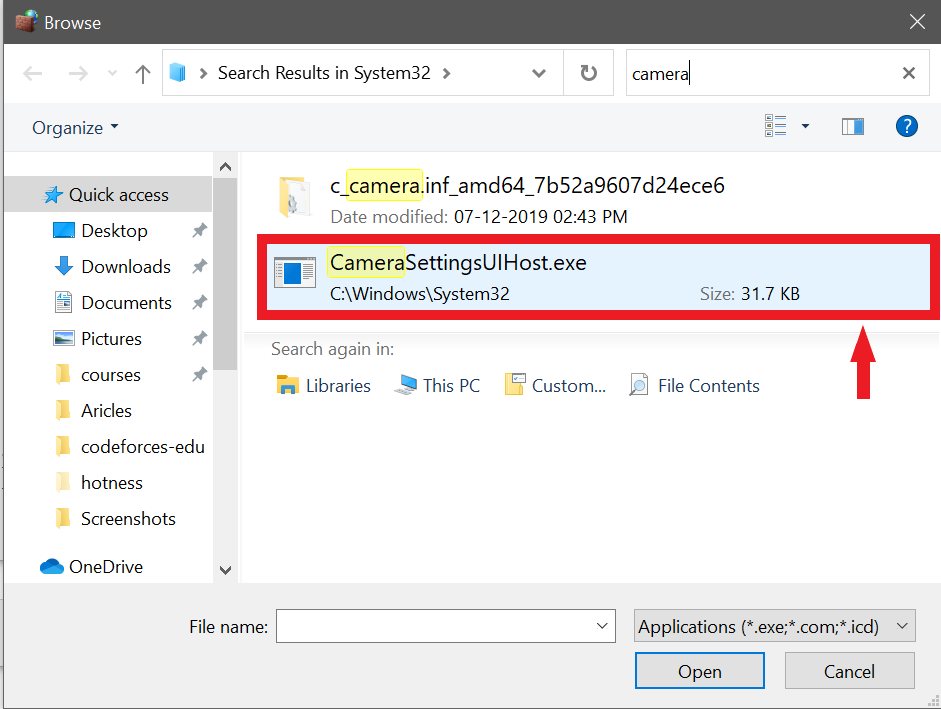
13. Now press Enter.
14. Next, click on the Add button.
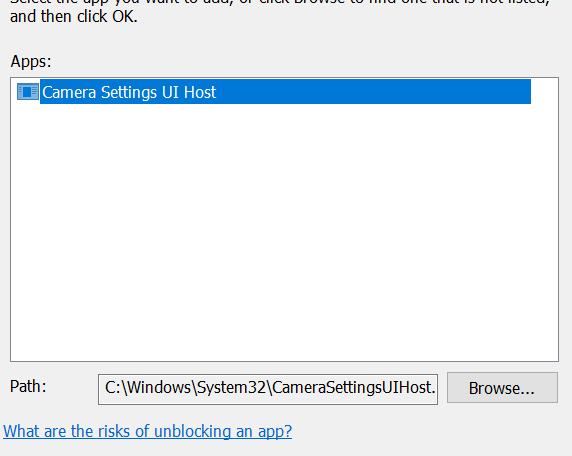
15. Next, check the box of both Private and Public.
16. Click on OK and exit the Control Panel.
Well, I hope you will not face the 0xa00f4292 error after implementing the above steps.
Allow the camera access from the Privacy settings
Here are the steps that can be used to allow access to the camera from the Privacy Settings.
1. Search for Settings in the Windows search bar.
2. Now click on the gear icon as shown below

3. Now open the Privacy section.

4. Now under App permissions present on the left side, click on Camera.
5. Now if you see Camera access for this device is off, then click on the Change button.
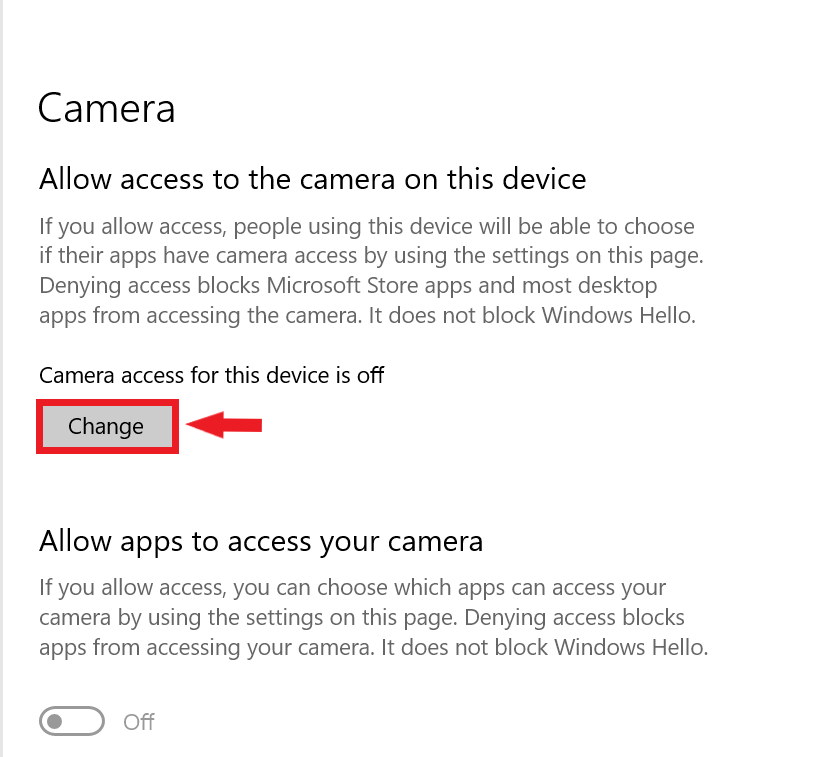
6. Now turn it on.
7. Exit the settings application.
Well, hopefully, this will resolve the error, however, if the error still exists then try to implement the next method.
Update the Camera Driver
Many times the 0xa00f4292 error shows up just because the Camera Driver is outdated, and hence it becomes very important to update it. Follow the steps referenced beneath in order to update the Camera Driver.
1. Click on Windows button, type Device Manager and click on it
2. Now among the list, find Cameras.
4. Next, double click on Cameras to expand it.
5. Now right-click on the camera you are trying to access, and select Update Driver.

6. Now click on “Search automatically for the driver”
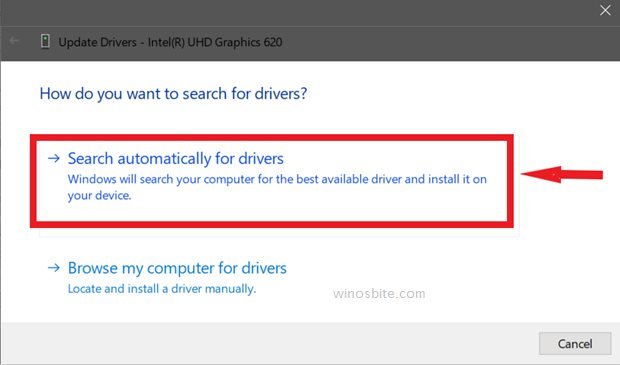
7. Now wait for the camera driver to update.
8. Next, Restart your PC.
In case the method has not helped you then you can try to reset the camera, read the next method to do so.
Reset the Camera Application
Many users have reported that they were able to get rid of the 0xa00f4292 error just by resetting the Camera application, and hence one should try to reset the camera application, if none of the above methods works, here is how you can do so.
1. Search for Settings in the Windows search bar and click on it

2. Now click on the Camera located under Apps & Features.
3. Next, click on Advanced Options.
6. Now in the pop-up window find the Reset
7. Click on the Reset button.
Hopefully, the 0xa00f4292 error is fixed and hence you are not likely to encounter the same error while accessing the Windows Camera, in case the error is not fixed, then implement the next method.
Run the Windows Troubleshooter for Hardware and Devices
Now when you cannot fix the error it is always a savvy decision to allow Windows to take care of the error, and here the Windows Troubleshooter comes into play.
The Windows Troubleshooter runs a test and finds the cause of the error and eventually, it fixes it automatically. Follow the steps mentioned below to run Windows Troubleshooter.
1. Open the Command Prompt with Admin access
2. Next, type the command below and press Enter.
msdt.exe -id DeviceDiagnostic
3. Now click on the Next button as shown below:

4. Now let Windows Troubleshoot to detect any problem.
5. Now in case the problem is found and Windows recommends you a fix, click on Apply this fix.
6. Next, Restart your PC.
The above steps should fix camera error code 0xa00f4292 on your Windows 10.
I hope the above mentioned methods have helped you in getting rid of the error. In case you have any queries, then you can comment below, we will try our best to help you out.
Read next:
